Showing posts with label Source Code. Show all posts

Tutorial Lengkap Membuat Web Service Dengan Java

Satu yang belum pernah aku temui adalah tutorial membuat web service menggunakan java dengan database mysql. Selama ini aku mencari-cari tutorial ini, karena tidak menemukan akhirnya aku explor sana dan sini bahkan pernah putus asa. Aku yakin banyak temen-temen programmer java yang masih pemula mengalami hal yang sama. Oleh karena itu kali ini aku ingin memposting hasil risetku sendiri tentang bagaimana cara membuat web service di java untuk menampilkan database mysql.
Sebelumnya maaf buat para master java dimanapun berada, bukan ane mau pamer tapi hanya ingin share dengan temen-temen yang belum bisa. Kalau nanti ada kesalahan dan kekurangan, tidak berlebihan kiranya untuk memberikan masukan dan koreksinya :mrgreen:
OK, langsung aja.
Saat ini arah pengembangan aplikasi adalah menggunakan model SOA (service oriented application). Salah satu bentuk implementasi di tingkat dasar adalah penggunaan web service sebagai jalan untuk berkomunikasi lintas platform aplikasi. Gampangnya dengan web service, apapun aplikasinya (web, dekstop, mobile), apapun OSnya (linux, mac, solaris, windows) akan saling dapat berkomunikasi melalui bahasa xml.
Apa saja isi tutorial ini ?
1. Step by step membuat web service,
2. Script sql dari tabel yang digunakan
3. Hasil jadi dari tutorial ini dalam bentuk .war yang sudah siap digunakan atau dicoba dikomputer Anda.
Kita mulai !
Pertama adalah kebutuhannya yaotu di dalam komputer sudah terinstall database mysql, netbeans ide versi 6.5 atau 6.8, jdk 6
Kedua adalah skenarionya kita akan mempublish sebuah webservice untuk :
  1. menampilkan database karyawan
  2. mencari data karyawan berdasarkan nama
Buatlah terlebih dahulu tabel dengan nama tbl_karyawan yang susunannya seperti gambar berikut ini :

Dalam tutorial ini settingan usernya adalah :
User : user
Password : user
Host : localhost
Database : karyawan
Step 1.
Buka netbeans ide anda untuk memulai membuat project baru. Kali ini buatlah sebuah project Java Web -> Web Application

Step 2.
Kemudian klik Next dan dan beri nama project WebServices seperti gambar berikut ini. Kemudian pilih JDK 6 dan Application Servernya pilih Glassfish agar kita bisa melakukan testing pada web service yang kita buat

Step 3.
Setelah selesai maka akan tampil project baru pada editor netbeans seperti ini :

Step 4.
Kemudian buatlah pacakage untuk menyimpan class-class yang akan kita gunakan dalam webservice ini. Kita pisahkan antara package untuk util (Koneksi database helper class), model untuk merepresentasikan tabel karyawan dan service untuk web servicenya sendiri. Rancangannya adalah seperti ini :
  1. package ahsanfile.webservice berisi class tipe web service dengan nama DataKaryawan.java
  2. package ahsanfile.webservice.model berisi class Karyawan.java
  3. package ahsanfile.webservice.util berisi class Database.java, NestedExeception.java dan Warning.java
Dan pada hasil akhirnya tampil seperti gambar berikut ini, tetapi ini nanti dulu, silahkan langsung lanjut ke ke Step 5 untuk membuat WebService DataKaryawan

Step 5.
Cara membuat kelas ahsanfile.webservice.DataKaryawan
1. Pada package ahsanfile.webservice klik kanan pilin New - Web Service
2. Beri nama web service tersebut DataKaryawan kemudian
3. Pilih create from scratch
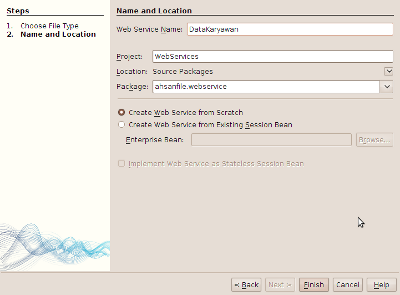
4. Kemudian klik finish dan akan tampil sebuah editor web service.
5. Pada editor tersebut tambahkan 2 buah method Operation masing masing bernama getKaryawan dengan tanpa parameter dan cariKaryawan dengan parameter bertipe String dengan nama namakaryawan
6. Hasil akhir dari editor web service adalahs sebagai berikut :
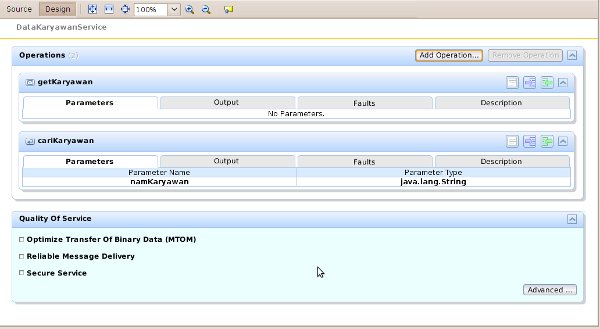
Skenarionya adalah getKaryawan untuk mengambil data di tabel tbl_karyawan semuanya dalam bentuk yang akan kita definisikan dalam class Karyawan. Kemudian cariKaryawan sama juga untuk mengambil data di tbl_karyawan tetapi dengan model pencarian berdasarkan parameter nama karyawan
Step 6.
Mendefinisikan class Karyawan. class ini berfungsi untuk merepresentasikan isi tbl_karyawan (secara sederhana) yang nantinya akan menjadi struktur xml dalam webservicenya. Pertama kita buat private atribut dari masing-masing field yang ada yaitu :
1. private int idKaryawan
2. private String namaKaryawan
3. private String alamatKaryawan
4. private String emailKaryawan
5. private String teleponKaryawan
Jangan lupa buat untuk getter dan setternya dengan cara klik kanan pada editor -> insert code -> Getter and Setter. Kemudian centang semua field. Maka getter dan setter akan dibuat oleh netbeans secara otomatis. Class Karyawan dapat dilihat berikut ini :
package ahsanfile.webservice.model;
/** * * @author ahsanfile */ public class Karyawan {
private int idKaryawan; private String namaKaryawan; private String alamatKaryawan; private String emailKaryawan; private String teleponKaryawan; private String errorMessage;
public String getAlamatKaryawan() { return alamatKaryawan; }
public void setAlamatKaryawan(String alamatKaryawan) { this.alamatKaryawan = alamatKaryawan; }
public String getEmailKaryawan() { return emailKaryawan; }
public void setEmailKaryawan(String emailKaryawan) { this.emailKaryawan = emailKaryawan; }
public int getIdKaryawan() { return idKaryawan; }
public void setIdKaryawan(int idKaryawan) { this.idKaryawan = idKaryawan; }
public String getNamaKaryawan() { return namaKaryawan; }
public void setNamaKaryawan(String namaKaryawan) { this.namaKaryawan = namaKaryawan; }
public String getTeleponKaryawan() { return teleponKaryawan; }
public void setTeleponKaryawan(String teleponKaryawan) { this.teleponKaryawan = teleponKaryawan; }
public String getErrorMessage() { return errorMessage; }
public void setErrorMessage(String errorMessage) { this.errorMessage = errorMessage; }
}
Step 7.
Sampai di sini hal utama telah kita lakukan. Sekarang tinggal melengkapi method getKaryawan dan cariKaryawan pada webService DataKaryawan. Isinya adalah seperti ini :
package ahsanfile.webservice;
 import ahsanfile.webservice.util.DataBase;
import ahsanfile.webservice.model.Karyawan;
import java.sql.PreparedStatement;
import java.sql.ResultSet;
import java.util.ArrayList;
import java.util.List;
import javax.jws.WebMethod;
import javax.jws.WebParam;
import javax.jws.WebService;
 /**
 *
 * @author ahsanfile
 */
@WebService()
public class DataKaryawan {
 /**
 * Web service operation
 */
 @WebMethod(operationName = "getKaryawan")
 public List<Karyawan> getKaryawan() {
 List<Karyawan> lk = new ArrayList<Karyawan>();
 DataBase db = new DataBase();
 try {
 String sql = "select * from tbl_karyawan";
 PreparedStatement ps = db.getConnection().prepareStatement(sql);
 ResultSet rs = ps.executeQuery();
 while (rs.next()) {
 Karyawan karyawan = new Karyawan();
 karyawan.setErrorMessage("");
 karyawan.setIdKaryawan(rs.getInt("id_karyawan"));
 karyawan.setNamaKaryawan(rs.getString("nama_karyawan"));
 karyawan.setAlamatKaryawan(rs.getString("alamat_karyawan"));
 karyawan.setEmailKaryawan(rs.getString("email_karyawan"));
 karyawan.setTeleponKaryawan(rs.getString("telepon_karyawan"));
 lk.add(karyawan);
 }
 return lk;
 } catch (Exception e) {
 Karyawan karyawan = new Karyawan();
 karyawan.setErrorMessage(e.getMessage());
 lk.add(karyawan);
 return lk;
 } finally {
 db.closeConnection();
 db = null;
 }
 }
 /**
 * Web service operation
 */
 @WebMethod(operationName = "cariKaryawan")
 public List<Karyawan> cariKaryawan(@WebParam(name = "namKaryawan")
 final String namKaryawan) {
 List<Karyawan> lk = new ArrayList<Karyawan>();
 DataBase db = new DataBase();
 try {
 String sql = "select * from tbl_karyawan where nama_karyawan like ?";
 PreparedStatement ps = db.getConnection().prepareStatement(sql);
 ps.setString(1, "%" + namKaryawan + "%");
 ResultSet rs = ps.executeQuery();
 while (rs.next()) {
 Karyawan karyawan = new Karyawan();
 karyawan.setErrorMessage("");
 karyawan.setIdKaryawan(rs.getInt("id_karyawan"));
 karyawan.setNamaKaryawan(rs.getString("nama_karyawan"));
 karyawan.setAlamatKaryawan(rs.getString("alamat_karyawan"));
 karyawan.setEmailKaryawan(rs.getString("email_karyawan"));
 karyawan.setTeleponKaryawan(rs.getString("telepon_karyawan"));
 lk.add(karyawan);
 }
 return lk;
 } catch (Exception e) {
 Karyawan karyawan = new Karyawan();
 karyawan.setErrorMessage(e.getMessage());
 lk.add(karyawan);
 return lk;
 } finally {
 db.closeConnection();
 db = null;
 }
 }
}
Class DataBase
package ahsanfile.webservice.util;

import java.sql.Connection;
import java.sql.DriverManager;
import java.sql.SQLException;

/**
 *
 * @author ahsanfile
 */
public class DataBase {
 private Connection connection;
 private String userName = "user";
 private String passWord = "user";
 private String hostName = "localhost";
 private String dbName = "karyawan";

 public DataBase() {
 try {
 DriverManager.registerDriver(new com.mysql.jdbc.Driver());
 } catch (SQLException e) {
 throw new NestedException("Error driver : " + e.getMessage(), e, 0);
 }
 try {
 connection = DriverManager.getConnection("jdbc:mysql://" + hostName + ":3306/" + dbName + "?user=" + userName + "&password=" + passWord);
 } catch (Exception e) {
 throw new NestedException("Error connection : " + e.getMessage(), e, 0);
 }
 }

 public Connection getConnection() {
 return connection;
 }

 public void closeConnection() {
 try {
 connection.close();
 } catch (Exception e) {
 throw new NestedException("Error close connection : " + e.getMessage(), e, 0);
 }
 }
}
Class NestedException
package ahsanfile.webservice.util;

import ahsanfile.webservice.util.Warning;

/**
 *
 * @author ahsanfile
 */
public class NestedException extends RuntimeException implements Warning {

 protected Exception nestedException;
 protected int issueId;
 private String _warning;

 public String getNestedMessage() {
 String nestedMessage = "";
 try {
 if (nestedException instanceof NestedException) {
 NestedException ne = (NestedException) nestedException;
 nestedMessage = nestedException.getMessage() + ne.getNestedMessage();
 } else {
 nestedMessage = nestedException.getMessage();
 }
 } catch (Exception e) {
 }
 return nestedMessage;
 }

 public NestedException(String msg, Exception e, int id) {
 super(msg);
 this.nestedException = e;
 this.issueId = id;
 _warning = msg;
 }
 public NestedException(String msg,String Warning, Exception e, int id) {
 super(msg);
 this.nestedException = e;
 this.issueId = id;
 }

 public Exception getNestedException() {
 return this.nestedException;
 }

 public int getIssue() {
 return this.issueId;
 }

 public String getWarning() {
 return _warning;
 }

 public void setWarning(String warning) {
 this._warning = warning;
 }
}
Interface Warning
package ahsanfile.webservice.util;

/**
 *
 * @author ahsanfile
 */
public interface Warning {

 public String getWarning();
}
Step 8.
Nah sampai di sini semua sudah lengkap dan diap untuk digunakan. Untuk dapat mengetes webservice yang barusan kita buat, maka pada project WebService klik kanan dan Deploy. Kemudian pada child Web Service klik kanan pada node DataKaryawan dan pilih Test Webservice. Maka jika tidak ada error akan tampil dalam browser seperti ini :

Coba klik tombol getKaryawan dan hasilnya adalah interface berupa xml yang siap untuk dikonsumsi oleh sitem kita. Seperti gambar berikut ini :

Kemudian coba masukan parameter nama pada method cariKaryawan dan klik tombol cariKaryawan. Dalam tutorial ini, saya memasukan parameter hadi dan hasil invokenya adalah seperti ini :

Sampai disini dulu share pengalaman dariku. Oh iya kalau masih ada error coba cek library mysqlnya sudah ada atau belum dan juga settingan user, host dan password pada class DataBase. Sebagai bukti tutorial ini jalan, berikut ini aku lampirkan attachment berupa .war dan sql script tabel tbl_karyawan. Silahkan download di sini Jangan lupa buang extention .ppt karena sebenarnya file tersebut adalah .tar.gz saja.

SourceCode Sistem Informasi Inventory Menggunakan Java


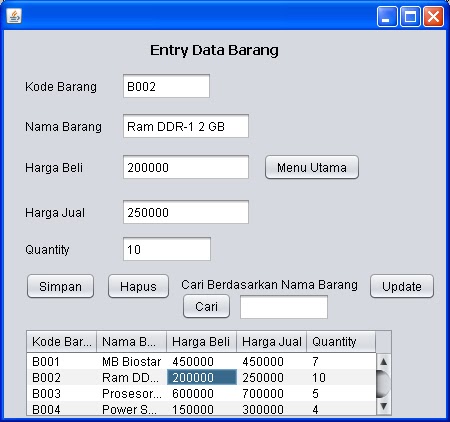
Aplikasi ini merupakan aplikasi inventory menggunakan bahasa pemrograman java NetBeans dan database Msc. Access (*.mdb atau *.accdb). Proses pembuatannya cukup simple karena bahasa java memiliki sifat bahasa program yang baku, sehingga dalam membuat suatu form yang masih berhubunggan dengan form yang telah dibuat sebelumnya dapat di refactor untuk di copy dan  di paste. Namun ada hal penting yang harus diperhatikan dalam menyusun atau membangun koneksi di database dan driver yang digunakan. Khusus program ini, koneksi ke database dibuat dengan menggunakan microsoft ODBC pada control panel dan diatur lokasi tempat penyimpanan database access yang telah dibuat sebelumnya. 


Adapun langkah awal adalah menyusun sebuah database di access yang berisi tabel-tabel yang berhubungan dengan apa yang ingin di tampilkan di tampilan program nantinya. Setelah selesai, dilanjutkan dengan proses pembuatan programnya di NetBeans.. Yang perlu diperhatikan adalah pada saat menyusun koneksi.java.... Pada drivernya kita harus tentukan nama dari data source name yang sudah kita buat pada saat membangun koneksi ODBC nya dn lokasi dari database accessnya.

ah... Panjang lebar sih kalo mau jelasinnya, mendingan langsung donwload aja ya, kalo ada pertanyaan, silahkan di tanya.. Lengkap dengan semua file dan databasenya..
Silahkan di download. 

SourceCode Sistem Informasi Penjualan Menggunakan Java

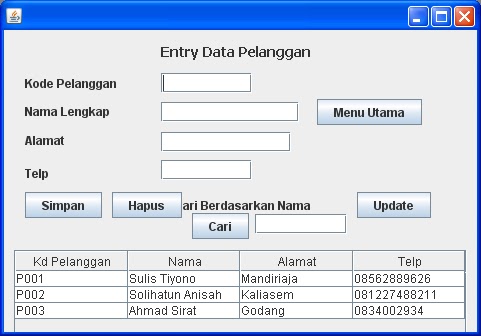
Source code dalam program ini hanyalah merupakan contoh sederhana yang dasarnya hanya untuk memperkenalkan model pemrograman menggunakan Java Netbeans 7.0.1 program ini merupakan awal dari sebuah pelatihan pemrograman java
Kebutuhan :

1. Netbeands 7.0.1 (download)
2. Konektor mysql-connector-java-5.1.12-bin (download)
3. Xampp (download)
4. My Sql Administrator GUI Tool (download)

Sebagai calon/programmer sebaiknya tahu spesifikasi minimal untuk menjalankan program-program tersebut, program ini menggunakan database MySql server dengan konfigurasi host: localhost user: root password :


untuk download source code :
download

Membuat Form Yang Transparan di Java Netbeans

Pastinya sangat menarik jika kita bisa membuat form menjadi transparan. form kita terlihat lebih elegant dan sangat bergaya. bagamana caranya. simak tutorial yang berhasil saya dapatkan di google. namun belum begitu saya pelajari. hehehe. saya posting disini dulu biar gampang nyarinya kalau kalau udah punya waktu untuk berexpertimen


Purpose

This tutorial demonstrates usage of Translucent and Shaped Windows in Java Swing applications.

Time to Complete

Approximately 30 minutes.

Overview

As of the Java SE 6 update 10 (6u10) release, you can add translucent and shaped windows to your Swing applications. This functionality is part of the public AWT package in JDK 7. You can create windows of three forms-
Window with uniform translucency : You can create window with uniform translucency where each pixel has the same translucency (or alpha) value.
Window with per-pixel translucency : You can create window where each pixel has its own alpha value. Make a part of the window translucent.

Window with any shape object :
You can create windows with a certain shape like circle, oval etc.

Software and Hardware Requirements

The following is a list of software requirements:
  • Download and install JDK 7.0 at this link.
  • Download and install NetBeans 7.0.1 at this link.

Prerequisites

Before starting this tutorial, you should have the software installed as listed under Software Requirements.

How to Implement Uniform Translucency

Windows with uniform translucency have the same translucency for each pixel. You can create uniform translucency by invoking the setOpacity(float) method in the Window class. The float argument passed to this method should be between 0 and 1. It represents the translucency of the window. The smaller the number, the more transparent the window.
The following example creates a window that is 55% opaque (45% translucent). If the underlying platform does not support translucent windows, the example exits.
1. Create a New Project. Select File > New Project.
Show Screenshot for Step

2. Select Java from the Categories column and Java Application from the Projects column and then click Next.
Show Screenshot for Step


3. Perform the following steps.
a. Name the project TranslucentWindow.
b. Uncheck the Create Main Class check box.
c. Click Finish.
Show Screenshot for Step


4. Right-click TranslucentWindow Project and select New > JFrame Form .
Show Screenshot for Step

5. Name the JFrame  TranslucentWindowDemo , package name demo, and then click Finish.
Show Screenshot for Step


6. Perform the following steps :
a. Right-click  TranslucentWindowDemo.java and select Open .
Show Screenshot for Step
b. Click Source tab.

7. Add the following import statements to the java class, TranslucentWindow.java
import java.awt.*;
import javax.swing.*;
import java.awt.event.*;
import static java.awt.GraphicsDevice.WindowTranslucency.*;


Show Screenshot for Step

8. Write the following lines of code in the main() method to determine whether translucency is supported by your system’s graphic device.
GraphicsEnvironment ge = GraphicsEnvironment.getLocalGraphicsEnvironment();
GraphicsDevice gd = ge.getDefaultScreenDevice();

Show Screenshot for Step
Not all platforms support these capabilities. An UnsupportedOperationException exception is thrown when a platform that does not support these features. Hence it is best practice to first check that the platform supports the capability. The GraphicsDevice class provides isWindowTranslucencySupported(GraphicsDevice.WindowTranslucency) method
that you can use for this purpose. You can pass one of three enum values, defined in
GraphicsDevice.WindowTranslucency, namely: PERPIXEL_TRANSLUCENT, TRANSLUCENT, PERPIXEL_TRANSPARENT.

9. Add the below code to the main method to exit the program if translucency is not supported by the graphic device.

if (!gd.isWindowTranslucencySupported(TRANSLUCENT)) {
System.err.println("Translucency is not supported");
System.exit(0);
}

Show Screenshot for Step

10. Perform the following steps to the constructor of the class, TranslucentWindowDemo() .

1. Delete the below NetBeans generated line of code.
initComponents();
Show Screenshot for Step
2. Add the following lines to set the properties of the frame.
super("TranslucentWindowDemo");
setLayout(new GridBagLayout());
setSize(300,200);
setLocationRelativeTo(null);
setUndecorated(true);
getContentPane().setBackground(Color.blue);

Show Screenshot for Step
11. Add the below code to the constructor to create a Button, Close and add the button to the frame.
JButton btnClose = new JButton("Close");
add(btnClose);

Show Screenshot for Step

12. To the constructor, add event handling code to the Close button.
ActionListener al;
al = new ActionListener() {

public void actionPerformed(ActionEvent ae) {
System.exit(0);
}
};
btnClose.addActionListener (al);

Show Screenshot for Step
The Close button responds to click event and closes the Frame .

13. Perform the following changes to the run() method .
1. Delete the below NetBeans generated line of code.
new TranslucentWindowDemo().setVisible(true);
Show Screenshot for Step
2. Next add the below lines of code.
TranslucentWindowDemo tw = new TranslucentWindowDemo();
tw.setOpacity(0.55f);
tw.setVisible(true);

Show Screenshot for Step
The above code performs the following :
1. Starts a thread to create the GUI.
2. Sets the transluency of the window to 55% .
3. Displays the window .

14. In the Projects pane, right-click TranslucentWindowDemo.java and choose Run File.
Show Screenshot for Step

15. The output with 55% translucent window will be as below.  You can click the Close button to close the Window.
Show Screenshot for Step
Note that the button is also affected by the uniform translucency. Setting the opacity affects the whole window, including any components that the window contains.
You can test the application with different opacity values .

How to implement Shaped Windows


A shaped window is an undecorated window whose appearance conforms to a specific shape . Pixels outside of the shape are transparent and reveal the background.
Java 7 allows you to create Window of various shapes. You can create circle, triangle, elliptic windows or more complex shape. You can create a shaped window by invoking the setShape(Shape) method in the Window class. The Shape passed to the method determines how the window is clipped.The following example creates an oval-shaped window. If the underlying platform does not support shaped windows, the example exits.
1. Right-click TranslucentWindow Project and select New > JFrame Form .
Show Screenshot for Step

2. Name the class ShapedWindowDemo, package name demo and then click Finish.

Show Screenshot for Step

3. Perform the following steps:
1. Right click ShapedWindowsDemo.java and select Open.
Show Screenshot for Step 2. Click Source tab.

4. Add the following import statements to the java class, ShapedWindowDemo.java
import java.awt.*;
import java.awt.event.*;
import javax.swing.*;
import java.awt.geom.Ellipse2D;
import static java.awt.GraphicsDevice.WindowTranslucency.*;


Show Screenshot for Step

5. Add the following lines of code in the main method to determine whether translucency is supported by your system’s graphic device.

GraphicsEnvironment ge = GraphicsEnvironment.getLocalGraphicsEnvironment();
GraphicsDevice gd = ge.getDefaultScreenDevice();
final boolean isTranslucencySupported= gd.isWindowTranslucencySupported(PERPIXEL_TRANSPARENT);

Show Screenshot for Step

6. Add the below code to the main method to exit the program if translucency is not supported by the graphic device.

if (!gd.isWindowTranslucencySupported(PERPIXEL_TRANSPARENT)) {
System.err.println("Shaped windows are not supported");
System.exit(0);
}


Show Screenshot for Step

7. Perform the following steps to the constructor of the class, ShapedWindowDemo() .

1. Delete the below NetBeans generated line of code.
initComponents();
Show Screenshot for Step
2. Add the following lines of code .
super("ShapedWindow");
setLayout(new GridBagLayout());
addComponentListener(new ComponentAdapter() {

@Override
public void componentResized(ComponentEvent e) {
setShape(new Ellipse2D.Double(0, 0, getWidth(), getHeight()));
}
});
setUndecorated(true);
setSize(300, 200);
setLocationRelativeTo(null);
setDefaultCloseOperation(JFrame.EXIT_ON_CLOSE);
add(new JButton("I am a Button"));

Show Screenshot for Step

8. In the Projects pane, right-click ShapedWindowDemo.java and choose Run File.
 
Show Screenshot for Step
The output will be as below
Show Screenshot for Step


9. Make the following changes to the run() method.
1. Delete the below line of code.
new ShapedWindowDemo().setVisible(true);
Show Screenshot for Step
2. Add the following lines of code .
ShapedWindowDemo sw = new ShapedWindowDemo();
sw.setOpacity(0.7f);
sw.setVisible(true);

Show Screenshot for Step

The above code is used to set the Transparency of the window to 70%.

10. In the Projects pane, right-click ShapedWindowDemo.java and choose Run File.
 
Show Screenshot for Step
The output with 70% translucent shaped window will be as below.
Show Screenshot for Step

Aplikasi Sistem Informasi Perpustakaan Berbasis Java

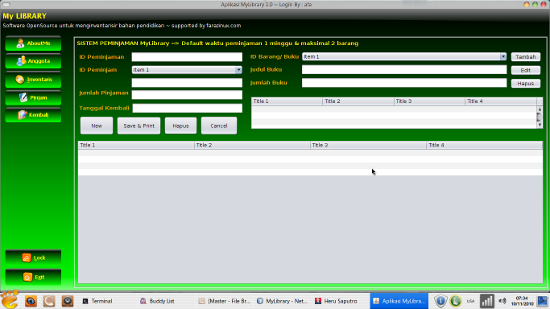
Dari pada pusing mending kembali ke habitat coding ach… Kali ini walaupun belum jadi saya suguhkan dulu tampilannya… barangkali ada yang berminat membantu menyelesaikan untuk coding isinya atau membantu memberikan tanggapan tentang designya. Yap, kali ini javanya menggunakan sedikit sentuhan dan memanfaatkan model CardLayout agar terintegrasi. Nah, berikut tampilan yang saya rencanakan. Mohon bantuannya dari berbagai pihak kalau ada yang berkenan untuk turut mengembangkan. :D


Sekali lagi saya ucapkan terima kasih… Semoga bermanfaat bagi kita semua…. Amin…

Artikel Lainnya