Java MySQL JDBC Tutorial using NetBeans
Are you asking ‘Could I connect Java application/applet to database like MySQL?’ and the answer is definitely Yes.
You can use JDBC (Java Database Connectivity) to connect your Java application/applet with database. So Let’s start.
First, Create new Project named anything you want, for example Javasql by click File->New Project.
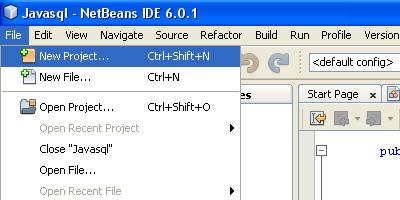
- newProject
then you’ll be on this frame
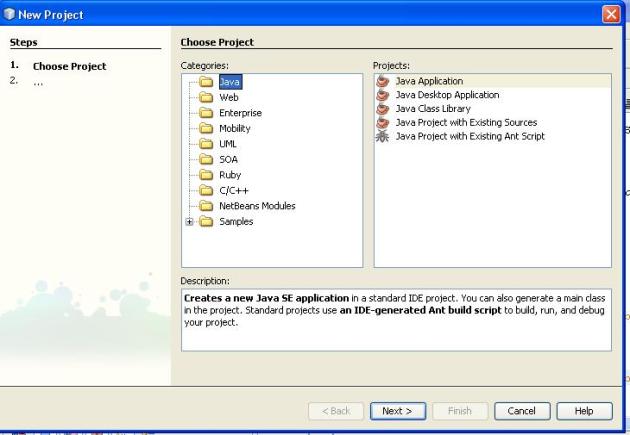
- javaapps
then click next, then give Project Name and set Project Localtion
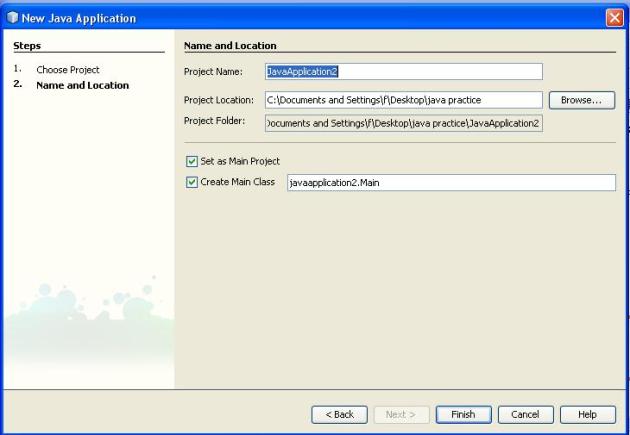
- nameProject
then finish.
Second, you must have JDBC MySQL Driver
before you can start to connect your Java program to database. But since
we use Netbeans , this has been done. Just simply add the library to
your project library. Right click in Library on the Project you use. 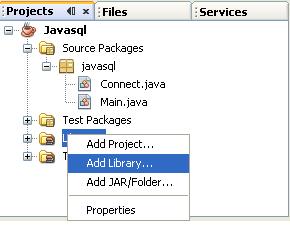

Then choose MySQL JDBC Driver
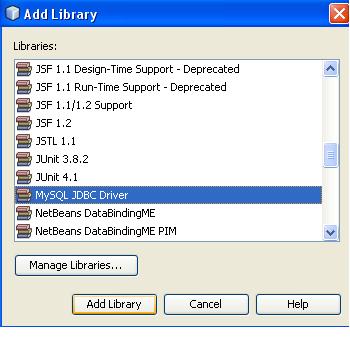
Then Click Add Libary.
So now we can connect to MySQL database. Here is the example how you can connect to MySQL.
Here, we use interface Connection.
package javasql;
import com.mysql.jdbc.Driver;
import java.sql.*;
/**
 *
 * @author Ferdiansyah Dolot
 */
public class Connect {
    public Connect() throws SQLException{
        makeConnection();
    }

    private Connection koneksi;

     public  Connection makeConnection() throws SQLException {
        if (koneksi == null) {
             new Driver();
            // buat koneksi
             koneksi = DriverManager.getConnection(
                       "jdbc:mysql://localhost/databasename",
                       "username",
                       "password");
         }
         return koneksi;
     }

     public static void main(String args[]) {
         try {
             Connect c = new Connect();
             System.out.println("Connection established");
         }
         catch (SQLException e) {
             e.printStackTrace();
             System.err.println("Connection Failure");
         }

    }
}
In example above we create connection to
MySQL from creating object of Driver and get connection from
DriverManager (get Connection will return Connection Object
type), with parameter the url, username, and password. The url above
means the database is located in localhost and the name is
databasename.You can also add port for MySQL so the url looks :
“jdbc:mysql://localhost:3306/databasename”. (See port 3306).
So now we can make a connection to MySQL database. Now, how can we do SQL statement like update, delete, insert, etc?
So now we can make a connection to MySQL database. Now, how can we do SQL statement like update, delete, insert, etc?
Source :
http://ferdidolot.wordpress.com/2009/06/14/java-mysql-jdbc-tutorial-using-netbeans-part-1/